
Defining a New Export Step
Export steps are used to export data from the Schema to an existing end-user's system. The Export step is flexible and allows not only to export new data but also to add new data to the existing one; or perform other actions based on pre-defined criteria. Follow the instructions in the section To Create a New Step and then continue below.
Warning: Associate the fields from the source application to specific fields in the Schema
The Export Schema to Target page has the following fields:
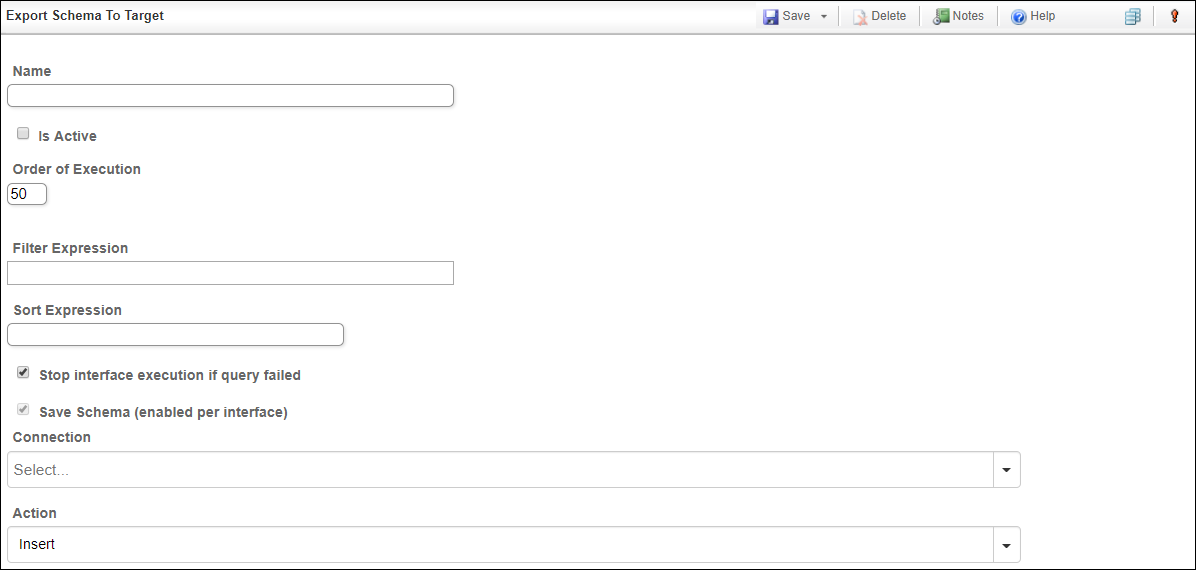
A New Export Step Page
The first six fields are described in the steps introduction. The following table describes the remaining fields.
| Field/Button | Description | Comment |
|---|---|---|
|
Connection |
Select the target database. Press Open for your reference, or if modifications or any changes are required in the pre-defined connection. |
Make sure that the Connection you select can be used as a data target. See Managing Connections . |
|
Entity Name |
An entity in the target system (a table or an entity in an ERP or CRM system). |
The list of available entity names appears only after selecting the target Connection, because it depends on the target application. |
|
Action |
Select one of the available options: If you selected Update/Delete or Upsert two additional fields will be added to the page: Schema Column and Source Column. These fields associate a specific field in the source system to a specific field in the Schema. The rows from the source system will Update/Delete or Upsert rows in the Schema based on this association.
|
The available options are: Insert: Insert new data into the target entity. Update: Update data already in the target. Delete: Delete data from the entity in the target system. Upsert: Depending on the key- either update or insert data. |
|
Schema Column |
Select the Schema Column to be associated with the selected Source Column. |
The field content only appears after selecting the Update, Delete or Upsert action. |
|
Source Column |
The target application field that matches the selected Schema Column. |
The field content only appears after selecting the Connection. |
|
The Export to Target Step toolbar, includes a button that is unique to this feature: |
||
|
|
Automap Schema columns to match columns in query. |
The columns from the query result will be automatically mapped to the schema columns with the same name. |

To Define a New Export Step:
Follow steps 1-9 in the introduction to this section.
- Select a Connection from the list. This is the target application (that will receive the data).
Warning: If you can't find the necessary Connection in the list, go to your Connection and make sure the Is Active and Is Source checkbox is enabled.
- Select an Action from the list.
- Insert: Follow steps 12 and 13 and then skip to step 16
- Update/Delete/Upsert: Continue and complete all the steps.
- In the Query box, enter a relevant query that will select the fields you wish to import (options: insert/delete/update).
- Click Test Query to test the query and check if it returns the required data (optional).
- Select a Schema Column from the list.
- Select a Source Column from the list.
- Click Save & Close to close the export step and end the session, or click Save & New to save and close the current export step and begin a new session.
- Click the Map icon to automatically map the Schema columns to columns in the target entity with the same name.
You have generated a new Export Step and you have associated the schema columns with the target columns.
Also, the user can manually manipulate the schema altering the current mapping.